


Introduction
Turning a simple image into a beautiful embroidered design is like magic, but it all comes down to a process called custom embroidery digitizing. This technique transforms your artwork—whether it’s a logo, photo, or sketch—into a stitch-ready file that an embroidery machine can read. Whether you’re personalizing a gift or creating branded apparel, digitizing lets you bring your vision to life with thread and fabric. This guide breaks down the step-by-step process of custom embroidery digitizing, making it easy for beginners and pros alike to create high-quality designs.
What Is Custom Embroidery Digitizing?
Custom embroidery digitizing is the art of converting an image into a digital file (like PES, DST, or JEF) that tells an embroidery machine where and how to stitch. It’s not just about uploading a picture—it involves setting stitch types, colors, and patterns to ensure the design looks great on fabric. The process requires software, a good eye for detail, and an understanding of how stitches work on different materials. Done right, it produces professional, durable designs that elevate any project.
Why Digitizing Matters
Digitizing is the backbone of embroidery projects. A well-digitized design ensures clean stitches, vibrant colors, and durability, while a poorly digitized one can lead to puckering, thread breaks, or distorted patterns. For businesses, it’s a way to create consistent, branded products. For hobbyists, it’s a chance to customize everything from tote bags to baby blankets. Mastering digitizing gives you control over your creations, saving money and unlocking endless creative possibilities.
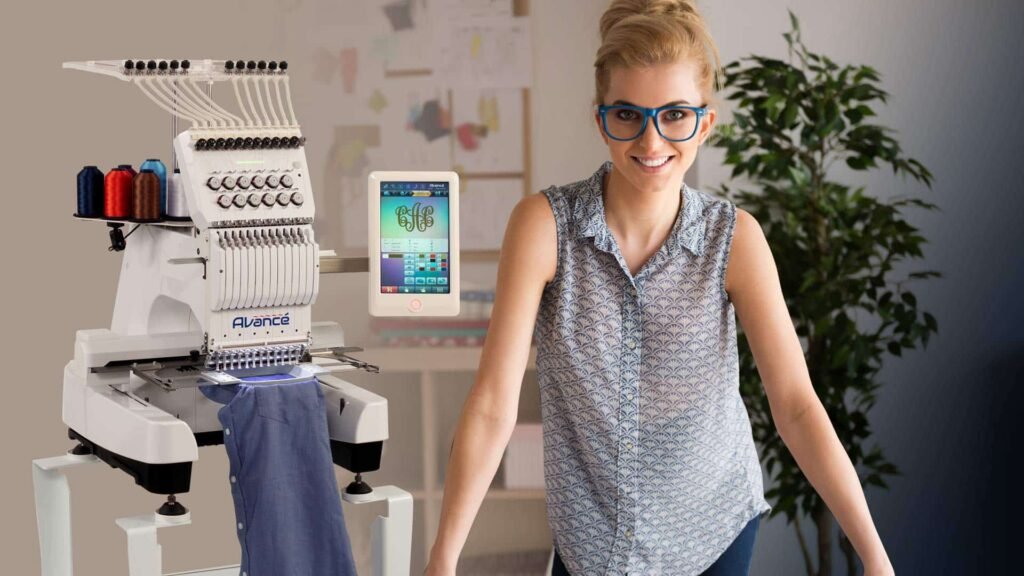
Tools You’ll Need
Before you start, gather these essentials:
- Embroidery Machine: Ensure it supports formats like PES (Brother), DST (Tajima), or JEF (Janome).
- Digitizing Software: Options include Brother PE-Design, Hatch Embroidery, or free tools like Ink/Stitch.
- Computer: You’ll need it to run the software and transfer files.
- High-Quality Image: Use a clear JPG, PNG, or vector file (SVG, AI) for best results.
- USB Drive: Most machines use USB to transfer digitized files.
Having these tools ready makes the digitizing process smooth and efficient.
Step-by-Step Process of Custom Embroidery Digitizing
Here’s a clear, step-by-step guide to digitize your design like a pro:
Step 1: Select the Right Image
Choose a high-quality image with clear lines and minimal colors. Simple logos, bold illustrations, or clean sketches work best for embroidery, as complex images with gradients or tiny details can be hard to stitch. Vector files (SVG, AI) are ideal because they scale without losing quality. If you’re using a JPG or PNG, edit it in free software like GIMP or Photopea to simplify colors and sharpen outlines before digitizing.
Step 2: Import the Image into Software
Open your digitizing software and import the image. Programs like Hatch or Ink/Stitch let you drag and drop or use a “File” > “Import” option. Resize the image to fit your embroidery hoop (e.g., 4×4 or 5×7 inches), keeping the aspect ratio locked to avoid distortion. Most software offers hoop templates for popular machines, so select one that matches your model to ensure the design fits.
Step 3: Trace the Design
Tracing turns your image into stitchable shapes. Use the software’s auto-trace feature for simple images or manually trace for more control. Manual tracing involves outlining each section—like borders, fills, or text—using tools like the pen or shape functions. Assign stitch types to each section: satin stitches for outlines, fill stitches for large areas, and running stitches for fine details. Take time here, as accurate tracing is crucial for a clean design.
Step 4: Set Stitch Parameters
Adjust stitch settings to suit your fabric and design. Set stitch density (stitches per inch) based on the material—lower for lightweight fabrics like cotton, higher for sturdy ones like denim. Choose stitch angles to follow the design’s flow, such as curved angles for organic shapes or straight for geometric ones. Add underlay stitches (a base layer) to stabilize the fabric and improve the top stitches’ appearance. Use the software’s 3D preview to check how the settings look.
Step 5: Assign Colors and Stitch Order
Select thread colors that match your image, using brands like Madeira or Isacord that are compatible with your machine. Assign colors to each traced section in the software. Set the stitch order to ensure background elements stitch first, followed by details, to avoid overlapping issues. Preview the color sequence in the software to confirm it matches your vision. Adjust if needed to keep the design cohesive.
Step 6: Save and Export the File
Once your design is complete, save it in your machine’s file format (e.g., PES for Brother, JEF for Janome). Check that the stitch count and file size are within your machine’s limits—some older models struggle with high-stitch-count designs. Save a backup in the software’s native format (like .ART or .DST) for future edits. Export the file to a USB drive or transfer it directly to your machine via a cable.
Step 7: Test the Design
Never skip testing. Use scrap fabric similar to your final material, hoop it with a stabilizer (tear-away for light fabrics, cut-away for stretchy ones), and load the file into your machine. Run a test stitch and watch for issues like thread breaks, puckering, or misaligned stitches. If something’s off, return to the software to tweak density, simplify details, or adjust stitch order, then retest until the design stitches perfectly.
Tips for Successful Digitizing
To take your digitizing skills to the next level, try these tips:
- Keep It Simple: Start with designs that have fewer colors and details to master the basics.
- Use Stabilizers: Always hoop a stabilizer under your fabric to prevent distortion.
- Practice with Free Tools: Try Ink/Stitch for free digitizing before investing in paid software like PE-Design.
- Match Fabric and Design: Adjust stitch density and type to suit your material for best results.
- Join Embroidery Groups: Online communities offer tips, tutorials, and inspiration for digitizing.
Common Mistakes to Avoid
Steer clear of these pitfalls to ensure great results:
- Using Low-Quality Images: Blurry or pixelated images lead to messy stitches.
- Overcomplicating Designs: Too many colors or tiny details can overwhelm your machine.
- Skipping Tests: Testing on scrap fabric catches issues before ruining your final project.
- Ignoring Fabric Type: Dense designs on thin fabrics cause puckering—match settings to material.
- Wrong File Format: Save in the correct format for your machine to avoid compatibility issues.
Best Software for Custom Digitizing
Choosing the right software makes digitizing easier. Here are top options:
- Brother PE-Design: Tailored for Brother machines, with robust features for beginners and pros.
- Hatch Embroidery: A powerful, user-friendly tool for detailed digitizing.
- Ink/Stitch: A free Inkscape extension, great for budget-conscious beginners.
- Wilcom EmbroideryStudio: A professional-grade option for complex designs, ideal for businesses.
Test free trials or open-source tools to find what works for your skill level and budget.
Conclusion
Custom embroidery digitizing transforms your ideas into stitched reality, and with the right steps, anyone can master it. By selecting a clear image, using quality software, tracing carefully, and testing thoroughly, you’ll create designs that look professional and stitch flawlessly. Whether you’re personalizing gifts or producing branded merchandise, this process gives you the power to customize with precision. Grab your tools, pick an image, and start digitizing today—your next embroidered masterpiece is just a few steps away!


